Tuesday, September 29, 2020

Ready to Launch

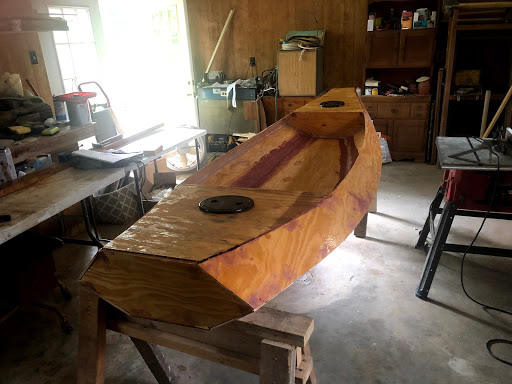
 Finished Product

Fittings installed in bow and stern decks. The Water Rat is all finished, named, and ready to launch. I am still working on a dolly made with PVC pipe, various nuts and washers, and Harbor Freight tires. That will make it easier for an old man like me to get it from the truck to the water.


Next Step

Go rowing!!! Thanks for following.

Friday, September 25, 2020

Installing the Seat

 Painting the topsides and installing the seat.

I have applied two coats of paint tp the topsides. The only thing left to be painted is the cockpit. I fabricated a mount for the seat. 

Seat mount fabricated and glued in place

Seat dry-fitted


Next Step

Fabricate a foot rest. Paint the cockpit. Go rowing.

Sunday, September 20, 2020

Painting the Bottom

 Finally Painting

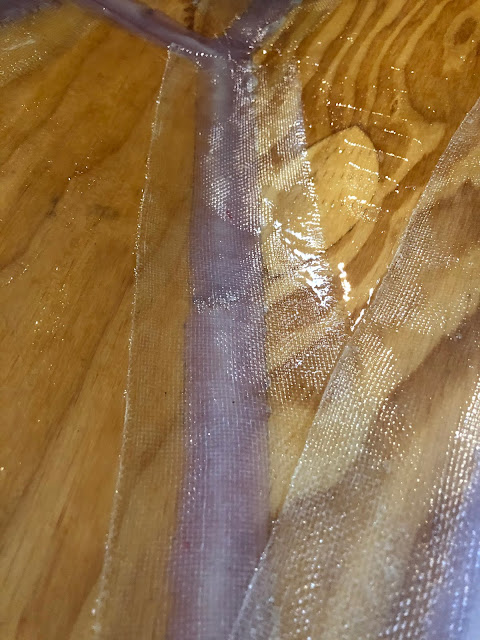
Painting covers a multitude of sins but also reveals some areas that need a little more sanding. So I will sand some more before adding a second coat. I've heard many boat builders say there comes a time when you just have to quit sanding. I can't wait to achieve that mindset.


Next Steps

Sanding, then add second coat on the bottom.

Thursday, September 17, 2020

Skegs

 Installing the Skegs

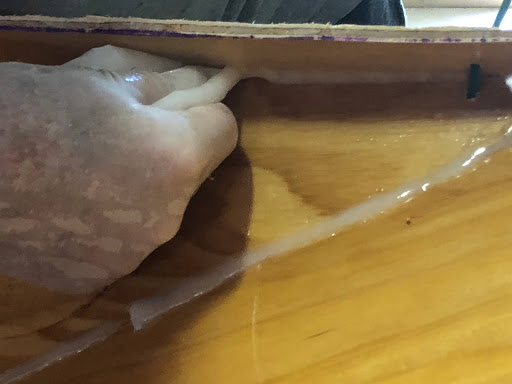
Today I added thickened epoxy around the edges of the fiberglass cloth which was installed on the bottom yesterday. I also cut the skegs and installed them.


If you look carefully you can see the epoxy fillets along the base of the skegs.

Next step

Tomorrow I will sand the filler around the edges of the fiberglass cloth. I will also install fiberglass around the skegs and wet it out.

Wednesday, September 16, 2020

Fiberglassing the bottom

 Applying Fiberglass Cloth

After dry-fitting and trimming the fiberglass cloth, I started at the front folding it back in small sections. When the folds were near the stern, I folded the stern piece forward on top the other folds. Then starting at the stern I wet it out section by section unfolding as I went. Thank goodness for slow hardener.

Starting at the stern


Working my way forward

finished stern

finished bow

Next Steps

Apply another coat of epoxy. Then fabricate the bottom skegs and stringers.

Tuesday, September 15, 2020

Fiberglass Cloth

 Cutting Cloth to fit

After a lot of filling and sanding of the bottom I have begun the process of fiberglassing the bottom. The fiberglass cloth has been draped over the boat and trimmed to fit. Tomorrow I will wet it out with epoxy.


Next Step

Wet out the fiberglass cloth with epoxy. 

Friday, September 11, 2020

Flip the Hull

 Making the Turn

The gunwale moldings are installed. The entire topsides was sanded, and another coat of epoxy was added. This morning the hull was flipped over so work can begin on the bottom. That will include filling the joints with thickened epoxy, applying fiberglass tape over them. Then the entire bottom will be covered with fiberglass cloth and finished out. There will be much sanding in the process.

Oak gunwale moldings installed. They will be finished natural.

Closer view of molding

Hull turned over - bow
Stern

Next Step

Fill and tape joints on the bottom.

Tuesday, September 8, 2020

Gunwale moldings

 Applying Gunwale Moldings

I epoxied and clamped the gunwale moldings in place. They are white oak so should ad even more strength to the structure. I added the port side yesterday, so you can see how it adds a finished look to the hull. 

Port side molding


Starboard side

Next Step

The moldings on the gunwales are the last structural piece to be added to the topsides. Next I will give it a good sanding, add another coat of epoxy to everything, and flip it over.

Thursday, September 3, 2020

Sanding, sanding, and more sanding

 Did I mention sanding?

I did a lot of sanding the last couple of days on the epoxy sanding filler I applied to the tape edges on the interior. Today I applied 3" fiberglass tape to the edges around the bow and stern decks and wet it out with epoxy. That will also have to be filled and sanded. This stage is not as much fun as the construction stages, but it's necessary to make the rat look nice. If there's anything I can't stand it's an ugly rat.


Next Step

Fill and sand the tape edges around the decks. Give the entire boat topsides a thorough sanding. It will soon be time to flip it over and work on the bottom. There is a light at the end of the tunnel.

Tuesday, September 1, 2020

Making Progress

 It's a Boat

I glued the decks in place with thickened epoxy. The holes for the storage access inspection ports have been cut out, bow and stern. Thickened epoxy applied along edges of fiberglass tape. After that cures there will be a lot of sanding to do.


Next Steps

Sand, sand, sand. Apply 3" tape to joints around decks. 

Friday, August 28, 2020

Framing Out the Bow and Stern Compartments

Installing Framing to Receive Deck Panels

Installed framing around the bow compartment. Took a little math to get the angles just right. The framing is epoxied in the bow. It's cut for the stern, but I ran out of clamps. Tomorrow is another day.

Stern


Bow

Decks dry fitted


Next Step
Finish installing deck framing, apply coats of epoxy to decks and glue them in place.
 

Wednesday, August 26, 2020

Applying Fiberglass Tape

Taping Interior Joints

Three inch fiberglass tape soaked in epoxy was applied to all interior joints. The boat feels very strong after sealing all the joints with epoxy fillets. The fiberglass tape should make it even stronger. My goal here is to survive the maiden voyage. This should help.

Bow and stern compartments taped


Next Step

Frame out bow and stern compartments to receive deck panels.

Monday, August 24, 2020

Second Layer of Thickened Epoxy

More Thickened Epoxy

I'm applying a the second layer of thickened epoxy over the first layer in all the interior joints. In the photos you can see where the procedure is finished in the rear compartment (stern). The blue tape has been removed there. The amidship section has been taped and is ready to receive the thickened  epoxy. The tape makes for a much cleaner line.


Amidships section taped 

Next Step

Apply three inch fiberglass tape to all interior joints

Saturday, August 22, 2020

Applying Thickened Epoxy Fillets

 Epoxy Fillets to Hold Everything Together

It's a sticky gooey mess to work with, but hopefully it works miracles. I mixed up thickened epoxy, put it in a small zip lock bag, and squeezed it into the joints. It's a very nasty job, but it will look good on my resume' if I ever decide to become a cake decorator. 


Next Step

After giving it a day or two to cure the temporary zip ties will be removed, and a larger epoxy fillet will be applied over the small ones. 

Friday, August 21, 2020

Looks Like a Boat!!!

 All Stitched Up

I completed stitching all the panels together with the temporary zip ties. The bulkheads and bow and  stern transoms are in place. They fit pretty well except for just a little sanding I had to do on one. 


Next Step

Apply a bead of thickened epoxy to all joints between the zip ties.

Thursday, August 20, 2020

Stitching the Panels Together

 It's Starting to Resemble a Boat

Today I stitched the lower side panels to the bottom. I had my doubts when I started the process (minor panic attack), but soon it became apparent that it would work. I am amazed at the talent boat designers have and the technical skill it takes to put the plans on paper. Thanks to Ross Lillistone for this cool design. The plastic zip ties temporarily hold everything together until thick epoxy fillets are placed in all the seams.


Nest Step

Install the bulkheads, front and rear transoms, and upper side panels.

Tuesday, August 18, 2020

Longitudinal Panels Cut

 Panels Cut

These panels will make up the outer shape of the hull. 


Next Step

Cut the bulkheads and bow and stern transoms. Then I'll begin to put it all together. It's exciting to watch how the shape of these panels will form the hull.

Sunday, August 16, 2020

Marking the Lines

 Taking Shape

Very tedious work - plotting points to 1/16 inch, driving finishing nails into them, curving the long batten I made yesterday around them, and connecting the dots. But still, it's fun watching the panels take shape. It's hard work, and it's around 95 degrees in the shop, but I perfected the art of taking breaks years ago.


Next Step

Cut the panels out.

Saturday, August 15, 2020

Scarfing a Batten

Making a Long Batten

I scarfed two pieces of wood together with thickened epoxy to make a long flexible batten for marking the long fair curves. While the epoxy cures, I'll be marking the points on the plywood.


Next Step

Mark the outlines for the various components of the Water Rat and cut them out.

Ready to Launch

  Finished Product Fittings installed in bow and stern decks. The Water Rat is all finished, named, and ready to launch. I am still working ...